If you’ve been asking yourself, “How do I set up IPTV?” — you’re in the right place. IPTV (Internet Protocol Television) is one of the fastest-growing ways to watch live TV, sports, movies, and on-demand content, all without a traditional cable or satellite subscription. In fact, the number of IPTV subscribers worldwide is expected to surpass 1.5 billion users in 2026, showing just how quickly people are switching to internet-based TV. The good news? Setting it up is much simpler than most people expect.
This guide breaks down the entire process from start to finish — no technical background required. Whether you’re using IPTV on a smart TV, a streaming stick, a phone, or a computer, you’ll find everything you need right here.
What Is IPTV and How Does It Work?
IPTV stands for Internet Protocol Television. Instead of receiving TV signals through a cable wire or satellite dish, IPTV delivers content over your internet connection. Think of it like Netflix or YouTube, but instead of only on-demand shows, you also get live TV channels from around the world.
Here’s a simplified breakdown of how it works:
- A provider hosts thousands of TV channels and video-on-demand (VOD) titles on their servers.
- You subscribe to that provider and receive a playlist file — commonly called an M3U playlist — or a login portal.
- You enter that playlist or login into a compatible IPTV app on your device.
- The app fetches the streams from the provider’s server and plays them directly on your screen.

What You Need Before You Start
Before diving into the setup process, make sure you have the following in place. Getting these basics right will save you a lot of frustration later.
1. A Reliable Internet Connection
IPTV streams content over the internet, so your connection speed matters. Here are the general speed recommendations:
| Stream Quality | Minimum Speed Required | Recommended Speed |
| Standard Definition (SD) | 5 Mbps | 10 Mbps |
| High Definition (HD) | 10 Mbps | 25 Mbps |
| Full HD / 1080p | 20 Mbps | 40 Mbps |
| 4K / Ultra HD | 40 Mbps | 60+ Mbps |
For the smoothest experience, a wired Ethernet connection is preferred over Wi-Fi, especially for 4K content. If Wi-Fi is your only option, make sure your router is close to your device and operating on the 5 GHz band.
2. A Compatible Device
IPTV works on a wide range of devices. We’ll cover your options in detail in the next section, but at a minimum, you need a screen with internet access and the ability to install an IPTV application.
3. An IPTV Subscription
You’ll need an active subscription from a reliable IPTV service provider. Once you subscribe, your provider will give you either:
- An M3U URL (a playlist link)
- An Xtream Codes login (username, password, and server URL)
- Access to a dedicated portal or app
Keep these credentials handy — you’ll need them during the setup.
4. An IPTV App
You’ll need a media player or IPTV application installed on your device to load your subscription and start watching. More on this in Section 4.
Choosing the Right Device for IPTV
One of the great things about IPTV is that it’s extremely flexible. You’re not locked into one type of device. Here’s a rundown of the most popular options:
Android TV Devices and Streaming Sticks
Devices running Android TV are by far the most popular choice for IPTV users. They give you direct access to the Google Play Store, making it easy to install IPTV apps. Popular options include Android TV boxes and streaming sticks from various manufacturers.
Amazon Fire TV Stick
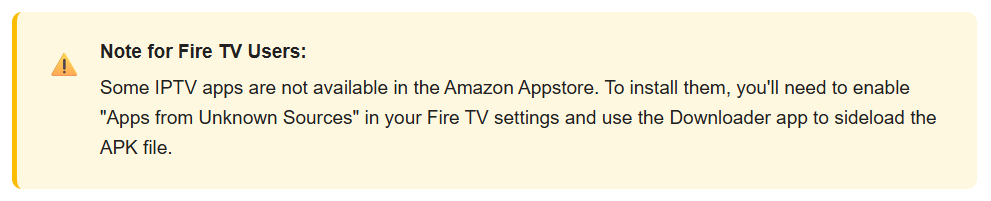
The Fire TV Stick is a widely used, affordable option. While it runs a modified version of Android, it supports sideloading apps (installing apps from outside the official store), which gives you access to a broad range of IPTV players.
Smart TVs
Most modern smart TVs — including those running Samsung Tizen, LG webOS, or Android TV — can support IPTV apps to varying degrees. Android-based smart TVs are the most versatile, while other platforms may have more limited app support.
iOS and Android Phones and Tablets
If you want to watch IPTV on the go, your smartphone or tablet works perfectly. There are solid IPTV apps available on both the Apple App Store and the Google Play Store.
Windows and Mac Computers
Desktop and laptop computers can run IPTV through dedicated apps or browser-based players. This is a great option if you want to watch at your desk or cast to a larger monitor.
Nvidia Shield and Similar Android Devices
High-performance Android devices like the Nvidia Shield offer premium streaming quality and are excellent for 4K IPTV playback with minimal buffering.

Choosing and Installing an IPTV App
The app you use to play your IPTV subscription is just as important as the subscription itself. The right app will give you a smooth, organized interface and reliable playback. Here are the most widely used options:
IPTV Smarters Pro
A highly popular, feature-rich app available on Android, iOS, and Fire TV. It supports M3U playlists and Xtream Codes logins, and offers a clean, modern interface with EPG (Electronic Program Guide) support for a traditional TV feel.
TiviMate
Often considered the gold standard for Android TV devices, TiviMate has an intuitive interface, smooth performance, and excellent EPG support. A premium version unlocks multi-screen viewing and other advanced features.
GSE Smart IPTV
Available on both iOS and Android, GSE Smart IPTV supports a wide variety of formats and is a reliable cross-platform choice.
VLC Media Player
While not specifically built for IPTV, VLC can load M3U playlists and is available on virtually every platform. It’s a solid backup option or a good starting point for beginners.
Kodi with an IPTV Add-on
Kodi is a powerful open-source media center that can be extended with IPTV add-ons. It offers a high degree of customization but has a steeper learning curve than other options.
Step-by-Step IPTV Setup Guide
Now for the heart of this guide. Follow these steps carefully and you’ll be up and running in no time. We’ll use an Android TV device as the primary example, with notes for other platforms where needed.
Step 1: Subscribe to an IPTV Service
Before anything else, you need an active IPTV subscription. After subscribing, your provider will send you your login credentials — typically via email. These might look like:
- An M3U URL: http://yourprovider.com:8080/get.php?username=xxx&password=yyy&type=m3u
- An Xtream Codes login: Server URL, username, and password
Save these somewhere accessible. You’ll need them in a moment.
Step 2: Download and Install Your IPTV App
On your device, navigate to its app store and search for your chosen IPTV player. For Android TV or Fire TV, popular choices include the apps mentioned in the previous section. Download and install the app as you would with any other application.
Step 3: Open the App and Add Your Subscription
Launch the IPTV app. You’ll typically be greeted by a home screen or login wizard. Here’s what to do next, depending on the type of credentials you have:
If you have an M3U URL:
- Look for an option like “Add Playlist,” “Add M3U,” or “Add New”
- Select “M3U URL” as the input type
- Paste or type in your M3U URL
- Give your playlist a name and save
If you have Xtream Codes credentials:
- Select “Xtream Codes API” or “Login with Xtream Codes”
- Enter your server URL, username, and password
- Tap “Login” or “Add”
Step 4: Wait for the Playlist to Load
Once you’ve added your credentials, the app will start loading your channel list. Depending on the size of your subscription and your internet speed, this can take anywhere from a few seconds to a couple of minutes. Be patient — this only happens once per setup.
Step 5: Browse and Organize Your Channels
After loading, you’ll see your full list of channels organized into categories (such as Sports, News, Movies, Entertainment, etc.). Most apps let you:
- Add channels to a Favorites list for quick access
- Filter channels by category or search by name
- Set up an EPG to see what’s on now and upcoming
Step 6: Set Up the Electronic Program Guide (EPG)
An EPG shows you the schedule for each channel, just like a traditional TV guide. Many IPTV providers include an EPG URL along with your subscription. To activate it:
- Go to the Settings or EPG section of your app
- Enter your EPG URL (provided by your IPTV service)
- Allow it to sync — this may take a few minutes
Step 7: Start Watching
That’s it! Select any channel from your list and enjoy. If you encounter any playback issues, refer to the troubleshooting section below.

Tips for the Best IPTV Experience
Even with everything set up correctly, there are a few best practices that can significantly improve your viewing experience.
Use a Wired Connection When Possible
Connecting your device directly to your router via an Ethernet cable eliminates Wi-Fi interference and delivers a more stable, faster connection — crucial for uninterrupted 4K streaming.
Use a VPN for Privacy and Performance
A Virtual Private Network (VPN) encrypts your internet traffic, protecting your privacy. Some users also find that a VPN reduces ISP throttling, which can improve streaming speeds during peak hours.
Clear Your App Cache Regularly
Over time, IPTV apps accumulate cached data that can slow them down or cause playback errors. Clearing the app’s cache every couple of weeks keeps things running smoothly. You can usually do this in your device’s app settings.
Keep Your App Updated
IPTV app developers regularly release updates that fix bugs, improve performance, and add new features. Always keep your app up to date to get the best experience.
Choose the Right Stream Format
Many IPTV subscriptions offer the same channel in multiple stream formats (e.g., HLS, RTMP, MKV). If one format buffers frequently, try switching to another within your app’s settings.
Restart Your Router Periodically
A simple router restart can resolve many connectivity issues. If you notice your IPTV acting up, power-cycling your router is always a good first step.
Common IPTV Problems and How to Fix Them
Even the best setups occasionally run into hiccups. Here’s how to handle the most common issues:
Buffering or Freezing
Buffering is the most common complaint from IPTV users. It’s usually caused by one of the following:
- Slow internet: Run a speed test. If your speeds are lower than the recommendations in Section 2, contact your ISP.
- Wi-Fi interference: Try switching to a 5 GHz Wi-Fi band or use a wired connection.
- Server overload: During major live events, some streams experience higher demand. Try a different stream variant if your provider offers one.
- VPN overhead: If you’re using a VPN, try switching to a server geographically closer to you, or temporarily disable it to test.
Channels Not Loading or Showing Error Messages
- Re-enter your subscription credentials to refresh the connection.
- Check that your subscription is still active and hasn’t expired.
- Contact your provider to check for server-side issues.
App Crashes or Freezes
- Clear the app’s cache in your device settings.
- Uninstall and reinstall the app.
- Check if a newer version of the app is available and update it.
EPG Not Displaying Correctly
- Force a manual EPG refresh inside the app’s settings.
- Ensure the EPG URL is entered correctly — even a small typo will cause it to fail.
- Wait up to 24 hours after setup for the EPG to fully populate.
Audio Out of Sync
- Some IPTV apps have a built-in audio delay/sync adjustment setting — use it to fine-tune lip-sync.
- Restarting the stream often resolves temporary audio issues.
Why Choose IPTV Smarter Pros?
Now that you know exactly how to set up IPTV, the next step is finding a provider you can trust. IPTV Smarter Pros is dedicated to delivering a premium, seamless IPTV experience — whether you’re a first-time user or a long-time cord-cutter.
Start Watching with IPTV Smarter Pros
Here’s what makes IPTV Smarter Pros the smart choice for your entertainment:
- 🌍 20,000+ Live Channels — Sports, news, entertainment, and international content from around the world
- 🎬 60,000+ VOD Titles — A massive on-demand library of movies and TV series, updated regularly
- 📺 4K & Full HD Streams — Crystal-clear picture quality on all supported devices
- ⚡ 99.9% Server Uptime — Reliable, high-performance servers that keep you streaming without interruption
- 📱 Multi-Device Support — Watch on Smart TVs, Android, iOS, Fire TV, PC, and more
- 📡 Full EPG / TV Guide — Know exactly what’s on and what’s coming up, just like traditional TV
- 🔒 No Contracts, No Hidden Fees — Flexible subscription plans with transparent pricing
- 🤝 24/7 Customer Support — Our team is always on hand to help you get set up and stay streaming
- 🚀 Easy Setup Assistance — We walk you through setup step by step, no technical experience needed
Ready to cut the cord and experience TV the smarter way? Book a free call with our team — we’ll answer all your questions, help you choose the right plan, and get you set up quickly and easily.
Conclusion
Setting up IPTV really is as straightforward as it sounds once you know the steps. To recap: you need a reliable internet connection, a compatible device, a trusted IPTV subscription, and the right app. Follow the steps in this guide, apply the optimization tips, and you’ll have a smooth, high-quality streaming experience that rivals — or surpasses — anything traditional TV has to offer.
Whether you’re watching live sports, catching up on your favorite shows, or exploring international channels, IPTV opens up a world of content at a fraction of the cost of cable. And with a provider like IPTV Smarter Pros backing you up with dedicated support and a robust content library, there’s never been a better time to make the switch.
FAQs
Is IPTV legal to use?
IPTV as a technology is completely legal. It’s simply a method of delivering television content over the internet. However, the legality of specific IPTV services depends on whether the provider holds the proper licensing rights for the content they distribute. Using a licensed, legitimate IPTV provider — like IPTV Smarter Pros — means you’re enjoying content within legal boundaries. Always verify that any IPTV service you use is properly licensed in your region.
Can I use IPTV without a smart TV?
Yes. You don’t need a Smart TV to use IPTV. Any regular TV can be turned into an IPTV-capable screen by connecting a streaming device such as an Android TV box or a Fire TV Stick to one of its HDMI ports. Alternatively, you can watch on a laptop, desktop computer, smartphone, or tablet — all without a Smart TV.
How many devices can I use with one IPTV subscription?
The number of simultaneous connections allowed depends on your specific subscription plan. Most standard IPTV plans support 1 to 2 simultaneous connections, while premium or family plans may allow 3 or more. IPTV Smarter Pros offers flexible plans to accommodate different household sizes — check the available plans or speak with their team to find the right fit for you.
Will IPTV work if my internet goes down?
No — IPTV requires an active internet connection to stream content. Unlike traditional satellite or cable TV, IPTV content is delivered entirely over the internet, so a loss of connectivity means a loss of access to your channels and VOD library. However, some IPTV apps allow you to download certain on-demand content for offline viewing, depending on provider permissions. For live channels, a stable connection is always required.
Can I record live TV with IPTV?
Yes, some IPTV apps support DVR-style recording of live channels, but this depends on both the app you’re using and whether your IPTV provider allows it. Apps like TiviMate (with the premium version) support local recording to an external storage device. Keep in mind that recording live streams may be subject to copyright restrictions depending on your location, so it’s worth checking the terms of your subscription before setting this up.
How do I switch IPTV providers without losing my setup?
Switching IPTV providers is generally straightforward. Simply obtain your new provider’s M3U URL or Xtream Codes credentials, then open your IPTV app and replace or add the new playlist. Most apps let you manage multiple playlists simultaneously, so you can test the new provider without removing your old one first. Once you’re satisfied with the new service, you can delete the old playlist from the app. Your device settings, favorite lists, and app preferences typically remain unaffected.